Connecting Azure DevOps to OneTaskList
- Click “Connect” on the Azure DevOps connection tile.
 This will open the Authorise Screen.
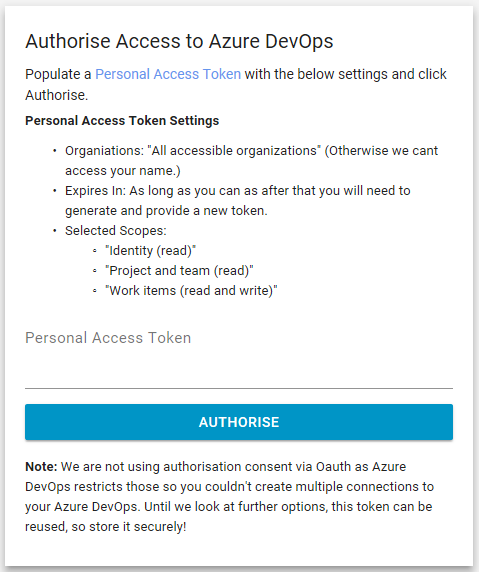
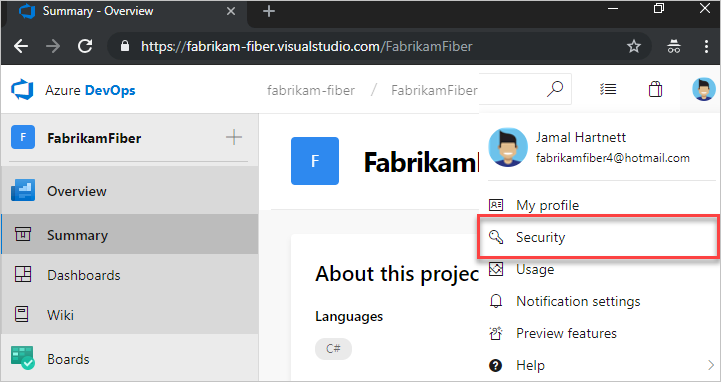
- Sign into your organization in Azure DevOps site.
- Select “Security” from your user account menu.
- Click “+ New Token”.
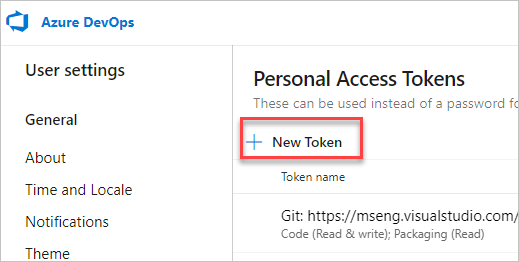 This will open the Create a new Personal Token screen.
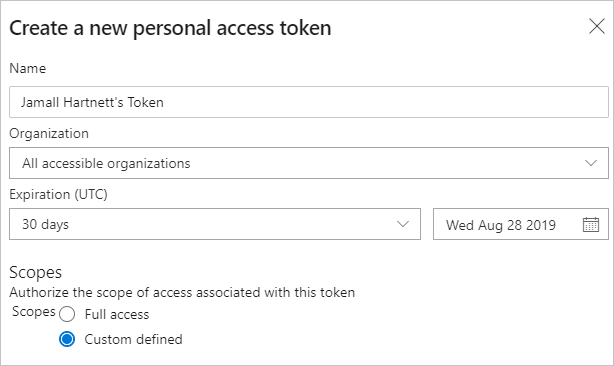
- Name this new token.
- Select your “Organization” name from the drop-down list.
- Select an “Expiration” for this token. Select the longest date range you can, as you will need to create a new Token when this one expires.
- Select the “Custom defined” Scopes radio button.

- Click the “Show all scopes” link to see the full list.

- From the Identity section, click “Read”.

- From the Project and Team section, click “Read”.

- From the Work Items section, click “Read & Write”.

- Click Create.
 This will open the Success! page that contains your token.
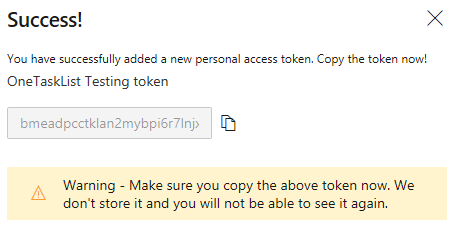
- Copy your token from the Success! page.
- Close the Success! Page.

- Copy your token into the Person Access Token field within your OneTaskList connection.

- Click “Authorise” on the connection screen to make your connection. This will open the Azure DevOps connection detail screen.
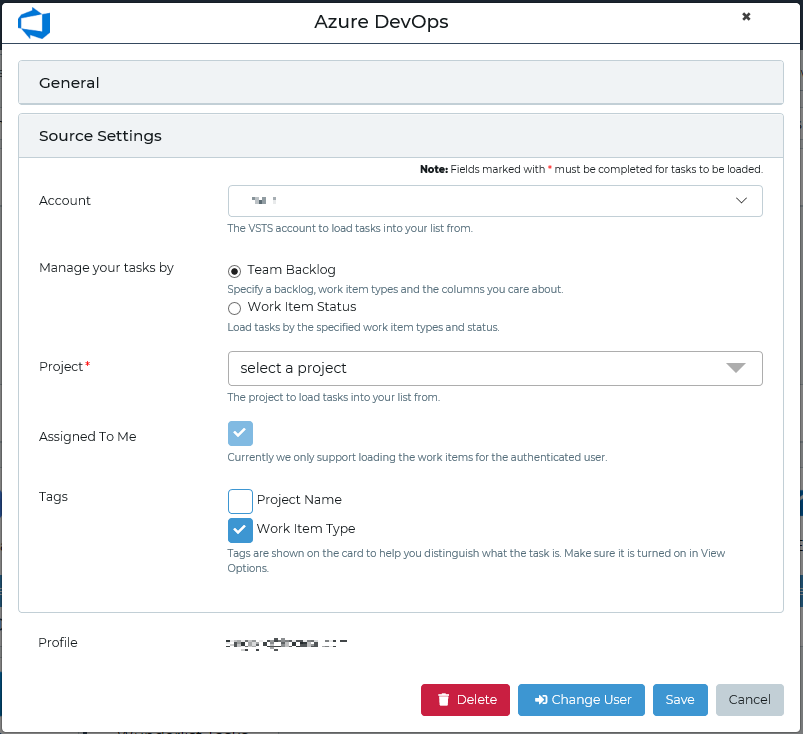
- Click the “General” header to open the general settings for this connection to change the name of this connection or change the display colour for tasks from this connection.
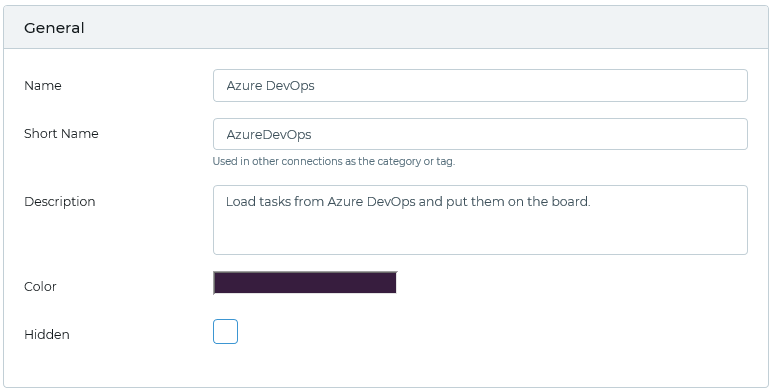
- Click the “Source Settings” header to see the more advanced connection settings. The Account value will be populated with the Organization you chose when you created the Token.
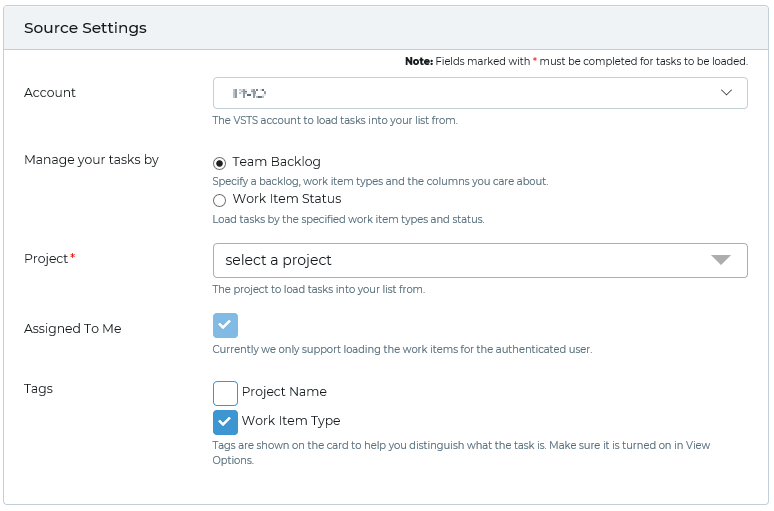
| Field | Description |
|---|---|
| Account | The Account value will be populated with the Organization you chose when you created the Token. |
| Manage your Tasks by | Team Backlog – allows you to select the Project, Team and Backlog you would like to connect to. Work Item Status – allows you to select the type of work item assigned to you to connect, using this option allows you to select multiple projects in this connection. |
If you selected Team Backlog, the following fields are displayed and need to be selected:
| Field | Description |
|---|---|
| Project | Allows you to select the Project you would like to connect to. You can only connect to one Project with each connection. |
| Team | Allows you to select the Team within the Project you would like to connect to. You can only connect to one team with each connection. |
| Backlog | Allows you to select the Backlog within the Team you would like to connect to. You can only select one Backlog with each connection. |
| Work Item Type Filter | Allows you to select the Work Items you’d like to connect to. You can select multiple items from this field. |
| Columns to Load | Allows you to select the columns you’d like to connect to. You can select multiple items from this field. |
| Done Column | This is where you select the column you would like “Done” tasks (tasks you complete within OneTaskList) to be moved to. You can only select one done column with each connection. |
If you selected Work Item Status, the following fields are displayed and need to be selected:
| Field | Description |
|---|---|
| Project Filter | Allows you to select the Project you would like to connect to. You can select multiple projects from this field. |
| Add a Work Item Type Filter | This is where you select the Work Type you’d like to connect to. You can select multiple items from this list. Whenever you select an item from this list a row will be added to the table Work Item Type table. |
| Status To Load | This is where you select the different status’ to load into OneTaskList. You can select multiple projects from this field. |
| Done Status | This is where you select the status you would like “Done” tasks (tasks you complete within OneTaskList) to be changed to. You can only select one done status with each connection. |
| Remove Mapping | As you can select multiple Work Item Types you can remove any that you do not need before you save the connection. |
The following fields are visible for either selection:
| Field | Description |
|---|---|
| Assigned to Me | This field tells the system to only synchronise tasks assigned to you. Currently the system only allows the option to show tasks assigned to the logged in user. |
| Tags | This is where you select what information is shown on the card. Either Project Name or Work Type Items can be selected. You can see this item when you have the Tags option selected on your board (LINK TO THAT INSTRUCTION) |
- Set your Source Setting for this connection.
- Click “Save”.
Your connection will now synchronise with OneTaskList and any items that met your configuration settings will be visible in OneTaskList.